
Why do we need this?
In order for Echobox to send emails using your domain, it needs to be authenticated by your domain host. Email services, like Gmail, Yahoo, Hotmail and many others, want to make sure that emails sent to their users are legitimate. If an Inbox Service Provider (ISP) thinks that your email could be coming from an untrustworthy source, it could stop the email from arriving in a reader’s inbox or block your domain altogether.
By setting up ways to properly authenticate your email domain, you ensure that your emails reach subscribers, maintaining engagement and keeping your company’s credibility high.
What do we use?
Echobox uses the following tools to ensure that ISPs recognise your emails and domain as trustworthy:
- DomainKeys Identified Mail (DKIM) - DKIM is a digital signature that is added to an email and secured with encryption.
- Domain-based Message Authentication Reporting and Conformance (DMARC) - DMARC helps prevent spoofing, which is where the From address of an email is forged. DMARC tells receiving mail servers what to do when they get a message that appears to be from your organization, but doesn’t pass authentication checks.
Where do I get my DKIM records?
1. Navigate to property settings by clicking the settings cog in the bottom left
2. Click on 'Domain verification'
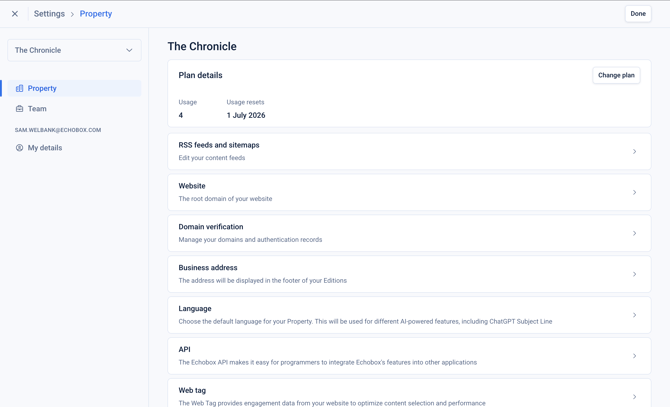
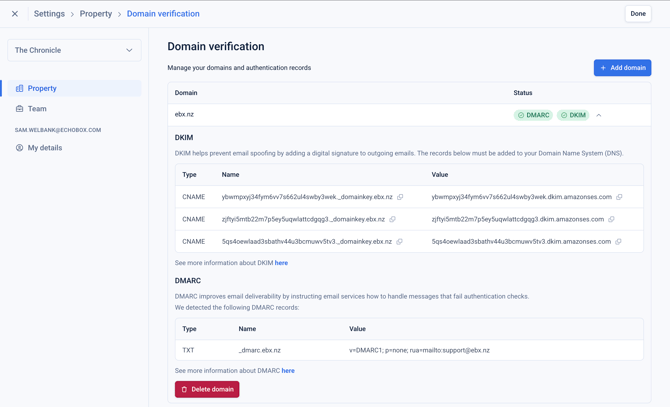
3. If your domain has not been added you can add it here. If it's already present you can expand the domain card and extract the CNAME records for the domain.
What do we need to do?
Below are the steps required to allow your emails sent by Echobox to be authenticated.
You’ll need to copy and paste the information Echobox will provide to you into your domain’s records. It may be necessary to share this with your technical team.
When an email is sent from Echobox, an ISP will check if that domain is allowed to send emails on your behalf by searching for these 3 records within your DNS.
- Log into the dashboard where you can access your DNS settings. It will look something like this but will vary depending on your domain provider:
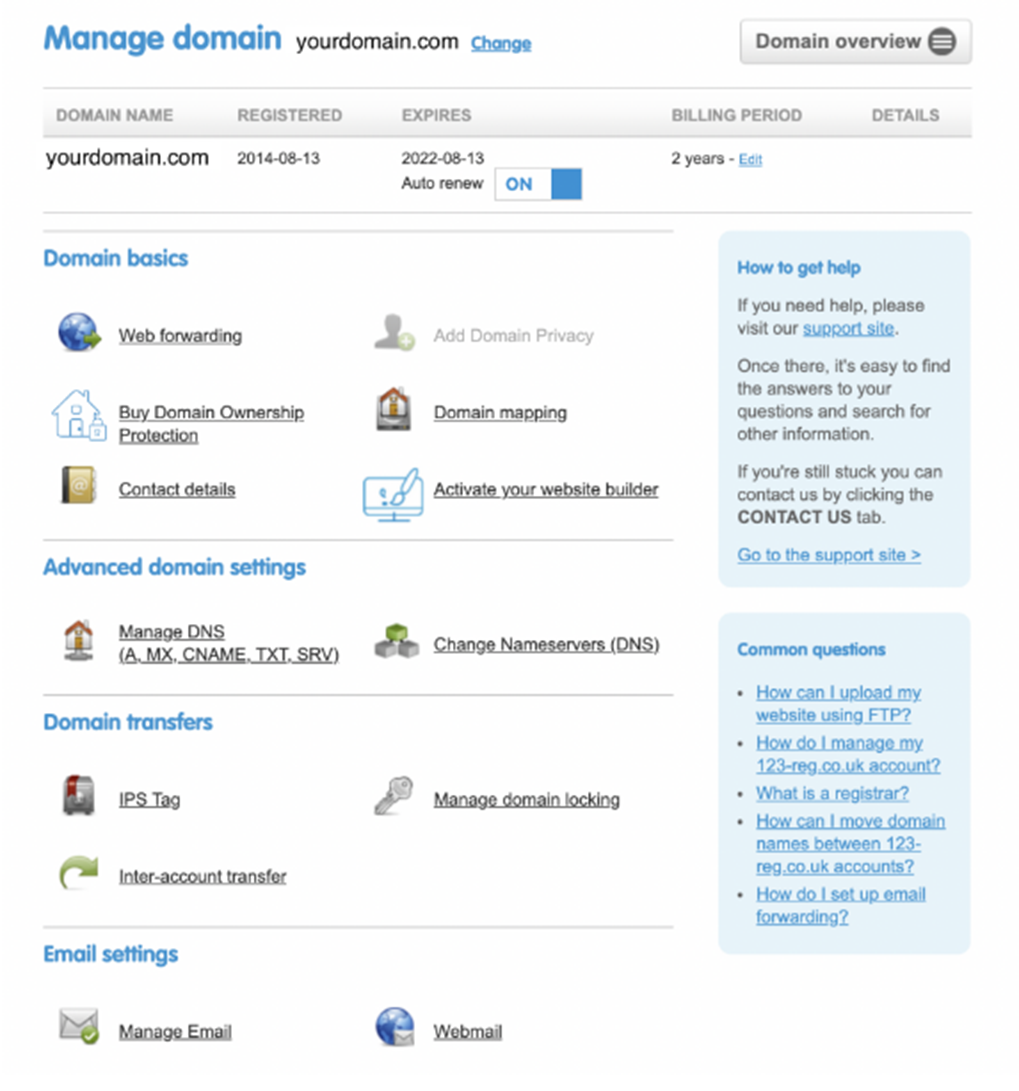
In this example, you would click on “Manage DNS” under “Advanced domain settings”
- Choose the correct domain and navigate to managing DNS settings.
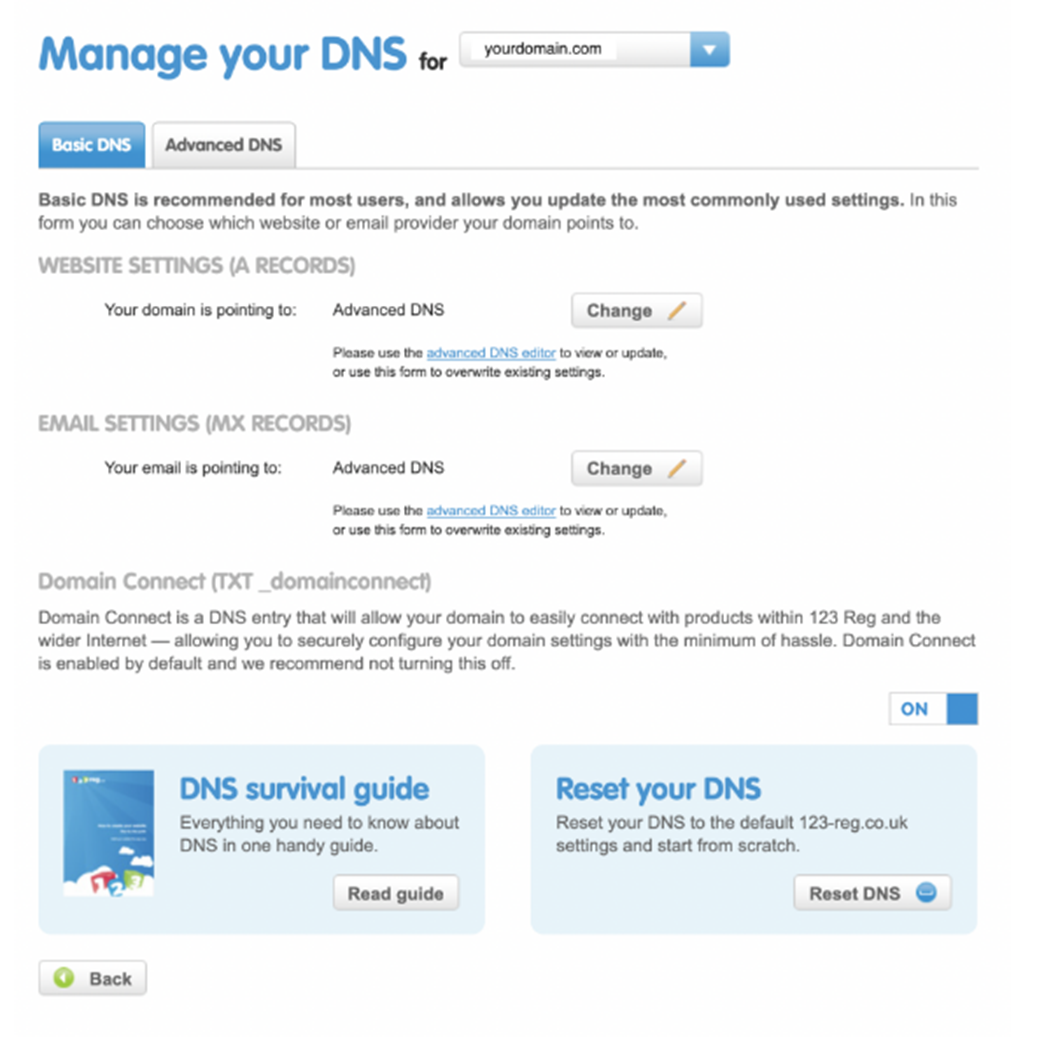
- Navigate to your advanced DNS settings if you cannot see an option to add CNAME records in the basic settings.
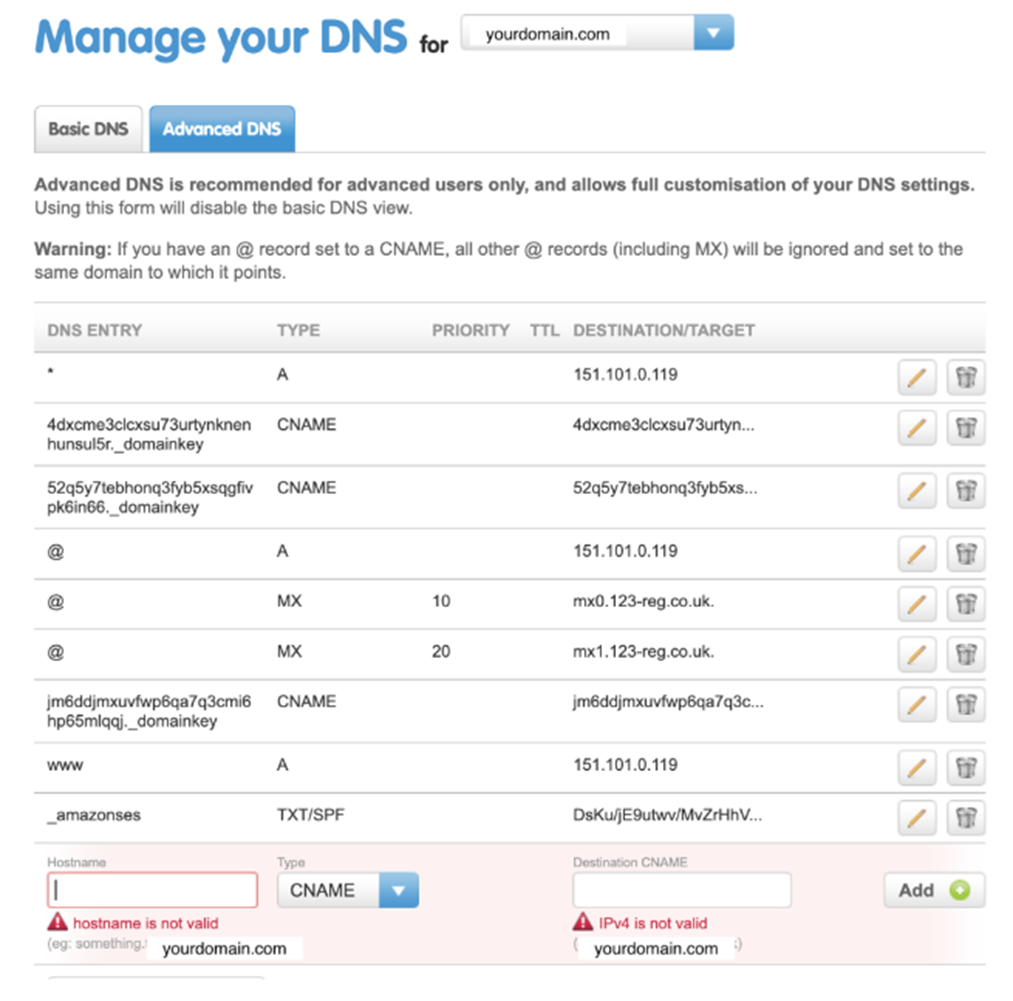
- Add each of the 3 CNAME snippets provided by Echobox into your DNS settings.
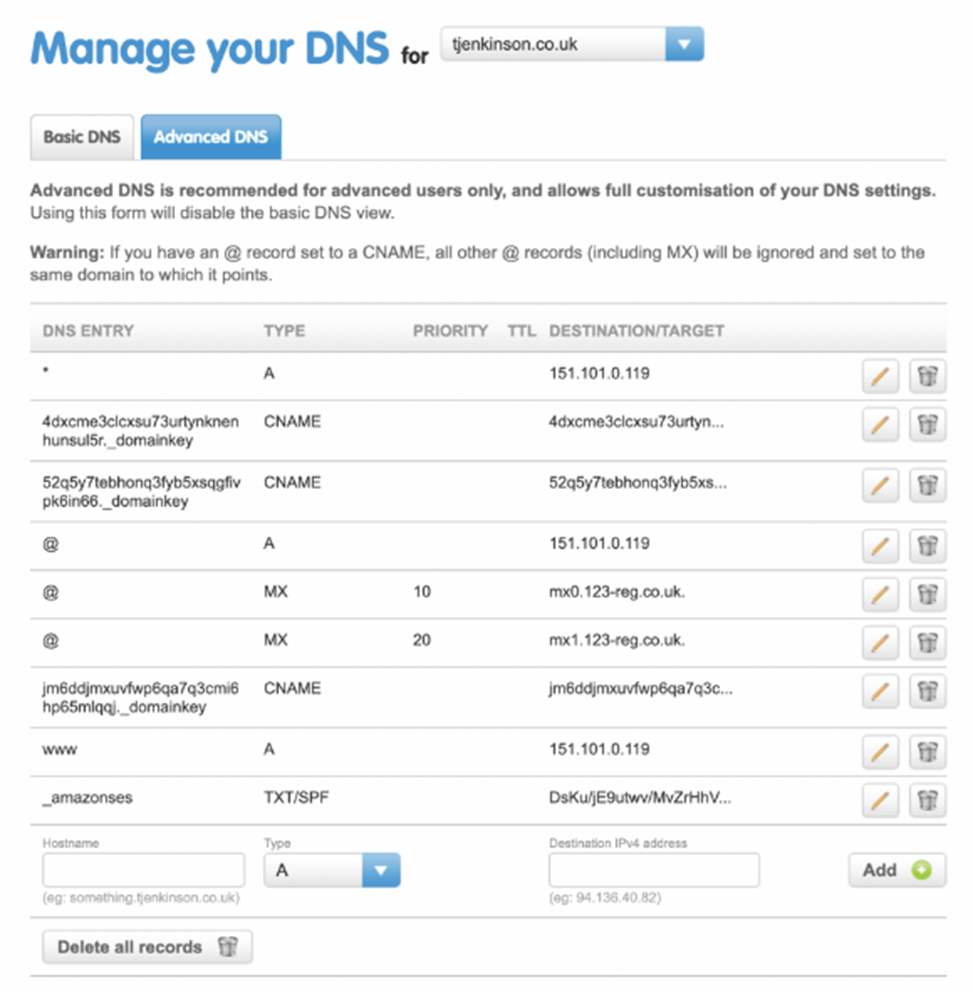
- Save your changes
How do I check the verification status of my domain?
Once you have configured your CNAME records navigate back to the 'Domain verification' page in Echobox to verify the status of the domain (this can take up to 72 hours).
Each domain will show a status with a corresponding colour:
- Green - domain has passed verification
- Yellow - domain has passed verification with an alert or warning
- Red - has failed verification
- Blue -verification is still pending
If the domain has failed verification, it is recommended to check the DNS configuration.
Once the domain is verified, Echobox will be able to enable your property for sending. Please contact support if there is any delay in this process.
Further Information
For more information on your DNS settings, Google have provided this guide .
Here is some guidance on how to edit DNS settings for several common hosting sites:
- Amazon Web Services
- Bluehost Bluerock
- Bluehost Legacy
- Dreamhost
- GoDaddy
- Google Domains
- Hostgator
- Hover
- IONOS
- Namecheap
- Squarespace
- Stablehost
- Wordpress
- Siteground
- Wix
If you have any other issues or questions, contact your Customer Success Representative or your domain provider.